Realistic Details in Interior Rendering in Photoshop
For times when you want to go an extra mile with your interior rendering, detailing is what you need. Here’s a tutorial showing adding such details in few click.
Fact 1: You don’t need best quality renders for such illustrations. This is the good thing about illustrations, they just need to reveal you thoughts to viewers and not the pixel size.
Fact 2: If have time left even after best quality renderings, these kind of works are icing on the cake !!!

MARBLE ENGRAVING Interior rendering in photoshop
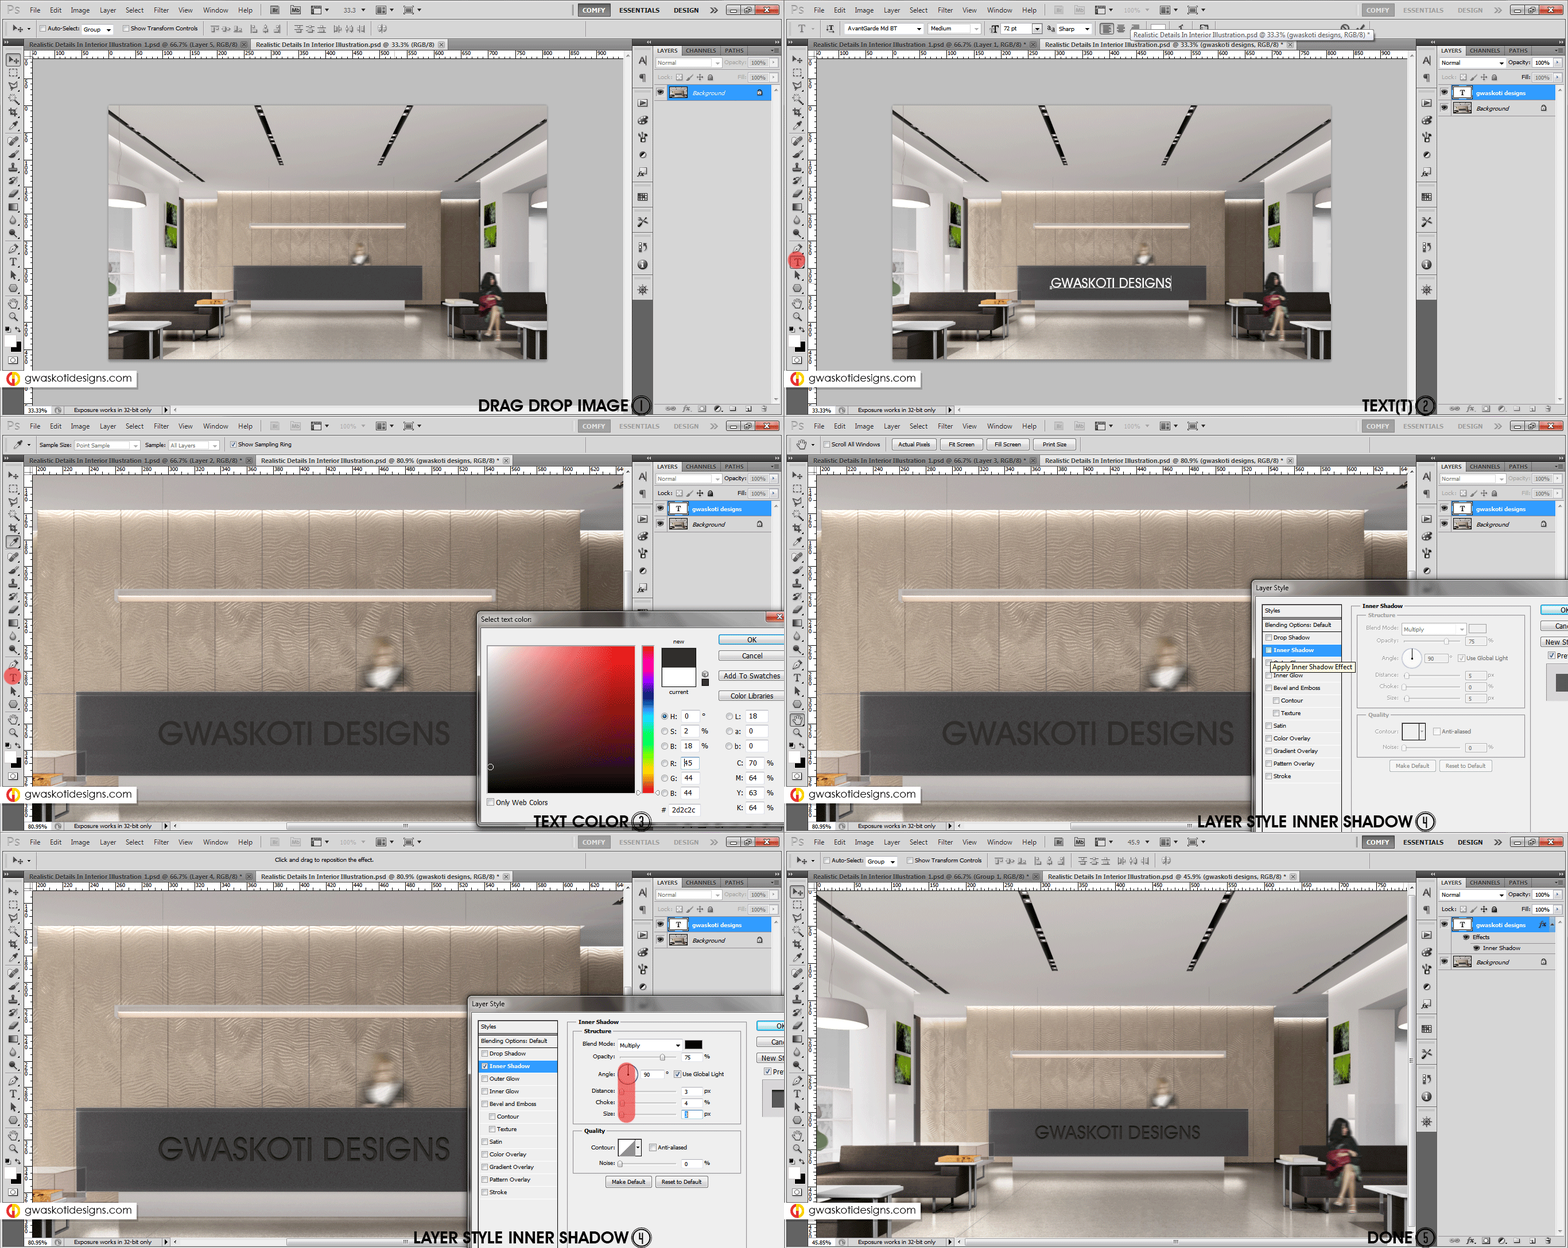
Steps: It’s all a play of using correct Layer Style. For engraving, all you need is Inner Shadow Layer style and careful attention to the detail. Drag drop you image in PS and add the desired text on image. Now the tip is, the color of text should be a darker tone of the surrounding material. For example, the background is grey, so the text should be more darker. The reason is, inner layers of a material are darker in tone or say the outer surface are bit faded.
To give the layer a depth effect, double click on layer to give it a INNER SHADOW layer style. Keep units minimum, because usually engraving is just 5-10mm. See source of light in rendered image and accordingly change the Shading Angle. Tadaa, we added a nice engraved effect to make our illustration more meaningful. SAVE
3D GLOW SIGN Interior rendering in photoshop
Steps 1: The Glow
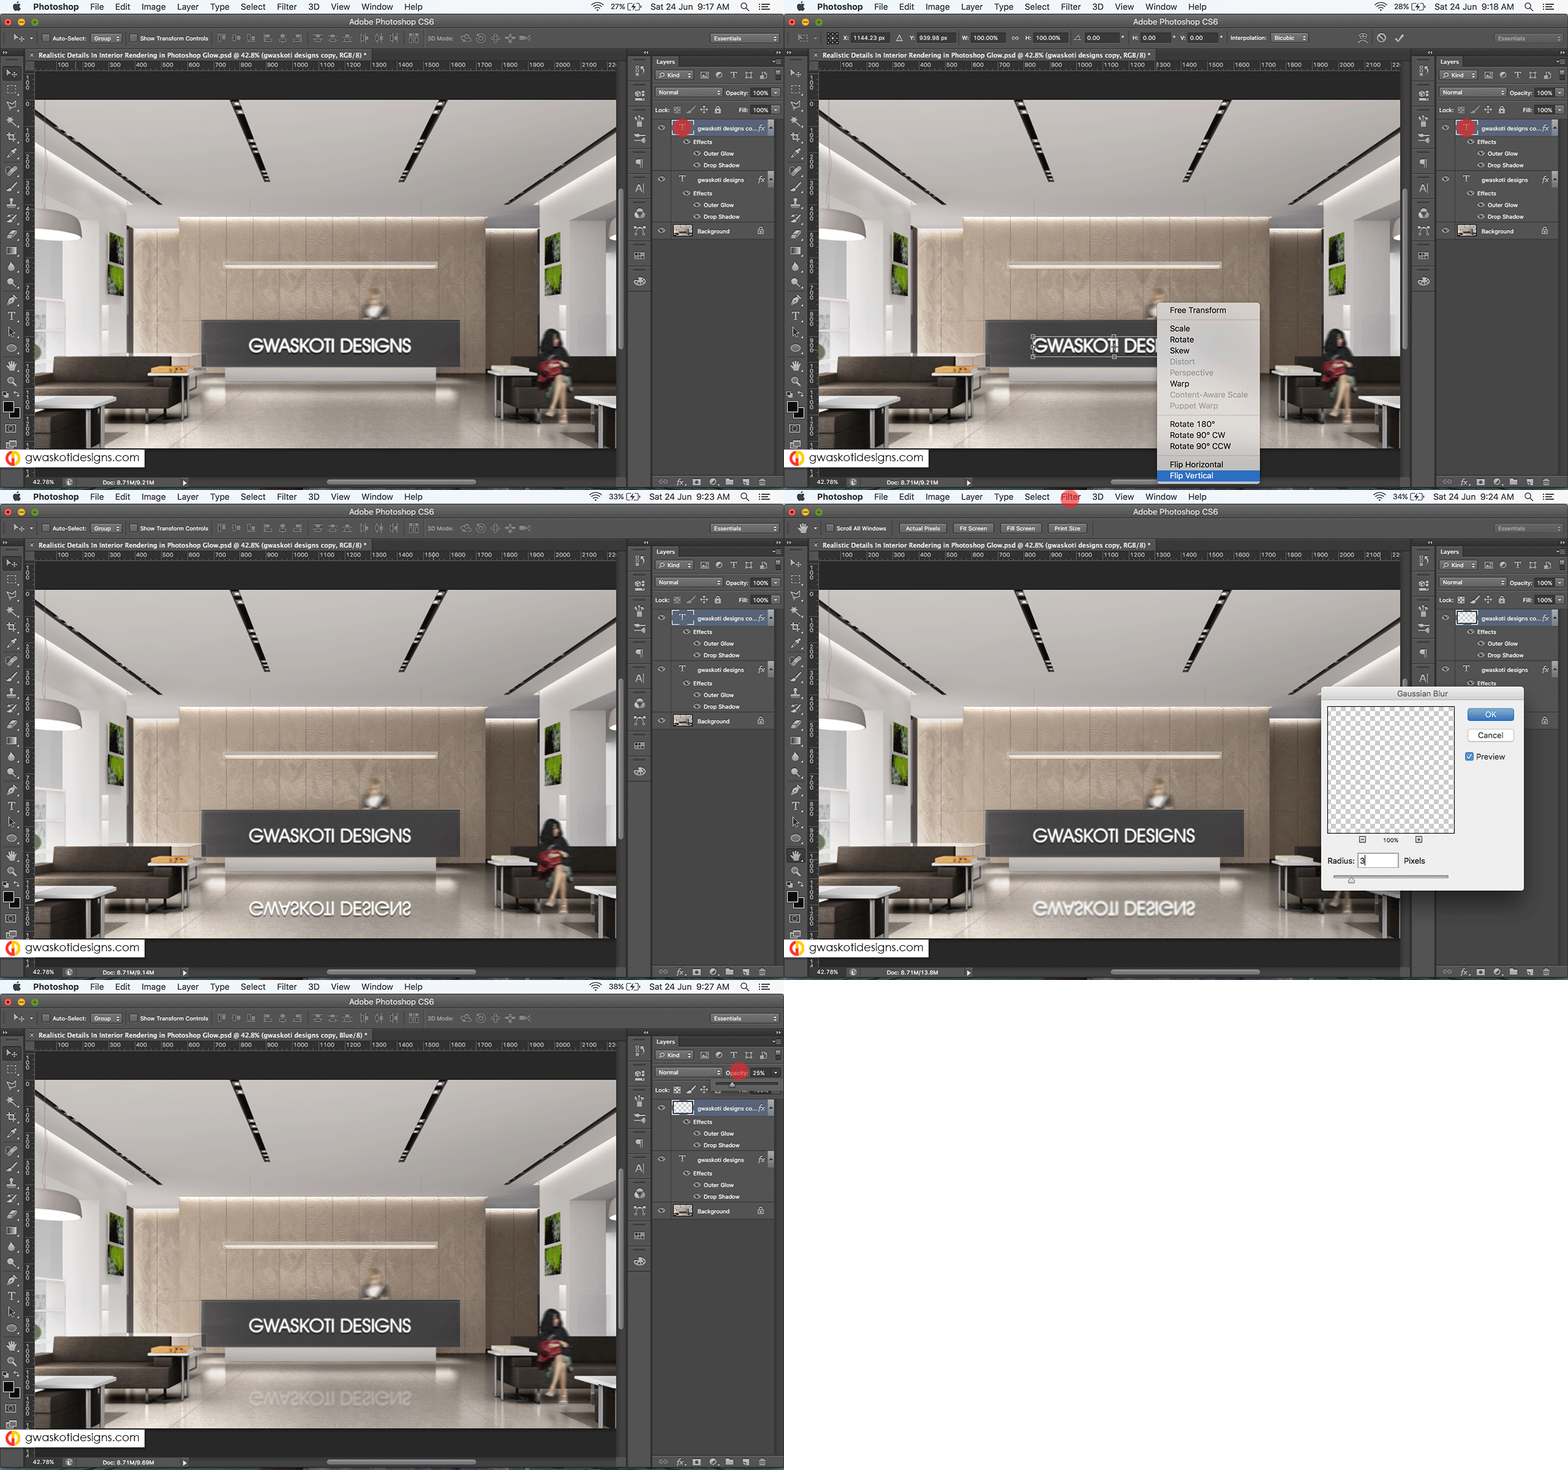
Again a play of using correct Layer Style. Steps are same as previous. To give the layer a glow effect, double click on layer to give it a OUTER GLOW layer style. Change units so that it gives a glowing effect but not too much. Take care in color of Glow, it can be anything just think once, if it suits the color scheme of the surrounding. Add DROP SHADOW to give a 3D depth effect, again think about how much thick your sign will be and how much shadow it may produce. See source of light in rendered image and accordingly change the Shading Angle. SAVE
Step 2: Reflection
Depending on material, finishes and lighting conditions, reflection in this case will be a faint inverted image of glow sign on floor. For this, first Duplicate the text layer (Ctrl/⌘+ J ). Flip the image vertically. Rotate and move downwards so that it forms a mirrored image of glow sign. Apply Filter>Blur>Gaussian Blur and reduce the opacity of layer to give the desired reflected effect on flooring. Reducing opacity compensates for overlay of texture/color of reflective surface on reflection. Tadaa, we have a catchy glow sign board to make our illustration more meaningful.
Next displayed are both the final products.


Know common mistakes/error/warnings and their solutions which you might face in this tutorial here.
Please give your comments (compliments will work too 😉 ) and share these tutorials as much as you can, we expect nothing else in return. Thank you!
Happy rendering and illustrating!


Loved the explanation. Thanks!
You are welcome Shruthi 🙂